Playgrounds are a great way to try out ideas but I have tended to use them standalone. They also make great companions when added to your Xcode projects. I especially like being able to use the playground live view to preview view and layout code without the need for Interface Builder.
Unfortunately a playground does not automatically get access to the code and resources of a project. Getting it all setup the first time is a pain so for future reference here is my step-by-step guide.
Last Updated: Feb 8, 2021
Note: I should warn you that I have pretty much given up on this approach. Three years later I still find using playgrounds for anything non-trivial to be frustrating. Since the release of Xcode 11 I’ve switched to using the Swift package manager for code reuse. See Creating Swift Packages in Xcode for details.
Starting with Xcode 12.5 you can also give your playgrounds access to your app types.
Creating a Custom View
To show the idea I have a minimal Xcode project, named GridView, based on the single view application template. Suppose I am using this project to develop a custom view that should draw a grid view with a configurable number of rows and columns. The details are not interesting but here is the interface to the class:
class GridView : UIView {
  var rowCount: Int { get set }
  var columnCount: Int { get set }
  var lineColor: UIColor { get set }
  var lineWidth: CGFloat { get set }
}
I can make this view designable and inspectable so that I can preview and configure it directly in Interface Builder. But what if I am not using Interface Builder? A playground live view can help fill that gap. Let’s look at how to do it.
Creating a Workspace
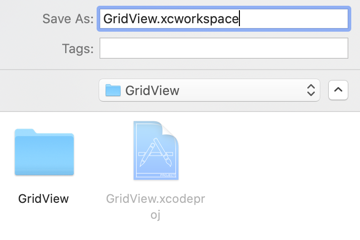
The first step is to create an Xcode workspace to contain both the Xcode project and the playground. Starting from my basic Xcode project use “Save As Workspace…” from the File menu.
I named the workspace GridView after the project name and saved the xworkspace file in the same location as the xcodeproj file:
Close the Xcode project and open the workspace. Remember in future to open the workspace file not the project or playground.
Adding a Playground
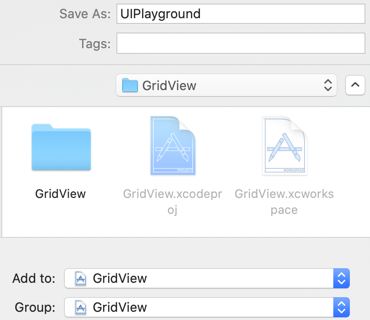
Create a new blank iOS playground with “File > New > Playground…” name and save it in the same location as the xcodeproj and xcworkspace files. Also make sure to select the option to add the playground to the workspace, keeping it at the top-level group:
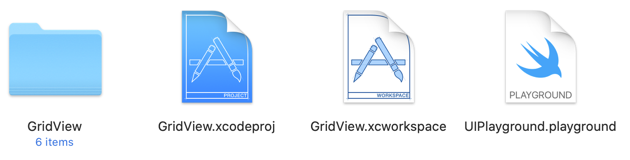
At this point you should have project, workspace and playground files in the root folder of the project:
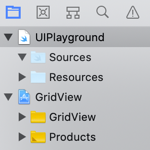
The project navigator should have both the playground and project at the top level:
Unfortunately we can’t just start using our project code and resources in the playground. The playground is its own module and cannot see the application target module. To get around that we can create a framework that we import into the playground.
Creating a Framework
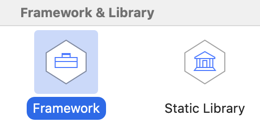
To create a framework for our custom view, use “File > New > Target…” and choose the iOS “Framework” template:
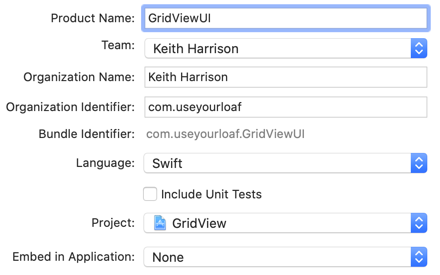
Name the framework (I used GridViewUI) and change “Embed In Application” to “None”:
We can now add those files we want to use in the playground to the framework target. In this case I just have the GridView class to add. Click on GridView.swift in the project navigator and then use the file inspector to add it to the framework. If I had other resources to share I would also add them to the framework at this point.
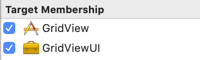
Note that I am leaving the GridView class as a member of the application target. In this simple case I am only creating the framework for use by the playground and not using it in the application. If you choose to embed the framework in the application remove the class from the application target.
We also need to make any interface we want to access from the playground public. The default internal access level restricts access to the module. So for example, make any type, property or method that you want to access in the playground public:
public class GridView : UIView {
  public var rowCount: Int ...
  ...
}
Build the Framework
Any time you add, remove or change files in the framework remember to rebuild it. With the framework target selected, choose one of the iOS simulators and then build the product (⌘B):
![]()
Import and Use
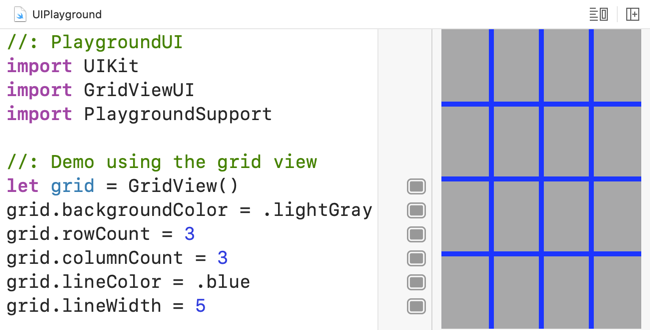
We should now be able to import the framework and use our GridView class in the playground:
import UIKit
import GridViewUI
import PlaygroundSupport

let grid = GridView()
grid.backgroundColor = .lightGray
grid.rowCount = 3
grid.columnCount = 3
grid.lineColor = .blue
grid.lineWidth = 5

grid.frame = CGRect(x: 0, y: 0, width: 200, height: 300)
PlaygroundPage.current.liveView = grid
Make sure you are showing the live view (“Editor > Live View”):
That’s all there is to it.
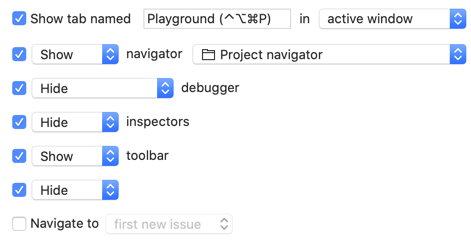
Create a Playground Tab
I like to use Xcode Behaviors to automatically configure a tab to show the playground. I have the shortcut ⌃⌥⌘P assigned to switch to it. You may need to select the playground and show the live editor the first time:
Getting the Code
You can find the full GridView Xcode project in my GitHub CodeExamples repository here: