Do you want the layout of your table view cells to follow the readable content width? If you were unlucky you may have even noticed the layout of your table view cells changing from iOS 8 to iOS 9. The extra wide margins are most noticeable on larger iPad screens.
Apple added readable content guides in iOS 9. In this post I look at how you configure your table view cells to use or avoid the extra wide margins they can cause.
Updated 9-Jul-2018: iOS 12 changes the default value of cellLayoutMarginsFollowReadableWidth from true to false.
Table View Cells and Readable Content Guides
Here is a table view with two rows both using the default table view cell style (image view + label). The screenshot is from a simulated iPad Air in landscape:

Here is the same table view with our cells using the readable content guides. Notice the much greater spacing for the left margin:

The readable content guide layout is only available on iOS 9. You use it when you want to keep text to a readable width for the user.
A Basic Table View with Interface Builder
Let’s create a simple table view with Interface Builder and add a single prototype cell using the default Basic cell style.
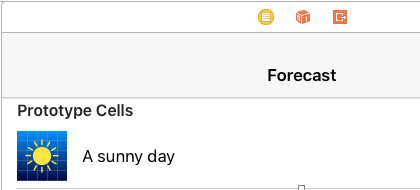
This table view cell has an image view and a text label:
Note that you cannot add auto layout constraints to one of the built-in table view cell styles. If we run this our table view cell does not follow the readable content guides (see first screenshot in this post). This seems like a good default for table views we create in Interface Builder. If we want to change this default behaviour we have two choices:
Using Interface Builder
With the table view highlighted in Interface Builder use the size inspector to tick the Follow Readable Width box.
![]()
You must set this on the table view. It has no effect if you set it on the table view cell or on the content view in the cell.
In Code
If you prefer you can also change the default behaviour in code using the cellLayoutMarginsFollowReadableWidth property of the table view. For example, in the viewDidLoad method of our table view controller:
if #available(iOS 9.0, *) {
  tableView.cellLayoutMarginsFollowReadableWidth = true
}
This is new in iOS 9 so remember to test for availability first if you still support iOS 8.
Using Custom Table View Cells
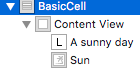
The cellLayoutMarginsFollowReadableWidth property only works if you are using one of the default table view cells (Basic, Subtitle, Left Detail, Right Detail). Once you use a custom table view cell and use auto layout for the cell content view you are on your own. Luckily it is trivial to support. Here is what my custom table view cell looks like in Interface Builder:
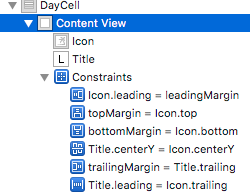
I have constraints set to pin my weather icon image to the leading margin and the text label to the trailing margin of the cell contentView. Choose the contentView in Interface Builder and again use the size inspector to tick the Follow Readable Width box:
![]()
Note you must do this on the content view, not the table view cell.
If you doing this with code create the constraints using the readableContentGuide property of the view instead of layoutMargingsGuide. See my earlier post on readable content guides for more details.
Defaults for a Table Created in Code
If you create table views in code you need to be careful as the default setting for cellLayoutMarginsFollowReadableWidth is true for iOS 9 up to iOS 11. The default changed to false in iOS 12. If you are using one of the default table view styles and want to keep the iOS 8 layout when running on an iOS 9 device you need to change the default when creating the table:
let myTableView = UITableView(frame: view.frame, style: .Plain)
if #available(iOS 9.0, *) {
    myTableView.cellLayoutMarginsFollowReadableWidth = false
}
In Summary
Your choices if you want a table view cell to follow the readable width of a device:
Using Interface Builder
- For the built-in table view cell styles tick
Follow Readable Widthon the table view. - For custom cell styles tick
Follow Readable Widthon the table view cellcontentViewand create constraints with the margins.
In Code
- For the built-in table view cell styles set the
cellLayoutMarginsFollowReadableWidthproperty of the table view totrue. - For custom cell styles create the constraints with the
readableContentGuide.
Also remember if you create a table view in code the default for cellLayoutMarginsFollowReadableWidth is true up to iOS 11 and false starting in iOS 12. See Readable Width Table Views With iOS 12.