The split view controller is a complicated controller to master with many configuration properties and delegate methods with long complicated names. In this post I take a look at a minimal Xcode project to create my preferred setup for an adaptable master-detail layout that keeps both view controllers visible when screen size allows.
Last updated: Jun 12, 2020
Split Views - A Recap
I am going to assume you are familiar with the basic setup of a split view controller. It is a container for a master-detail style interface. Actions or choices made by the user in the primary (master) view controller change what the secondary (detail) view controller displays.
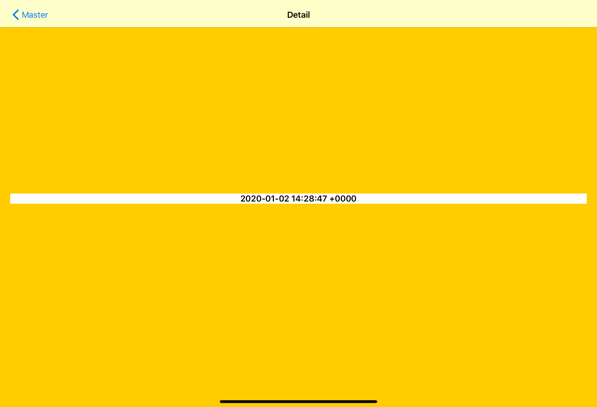
In the example below I have a master view controller (M) with a single button though it might typically be a table view. The button action updates a timestamp in the detail view controller (D) displayed side by side with the master view.

The display mode button allows the user to switch between having both views visible and having the primary view hidden as below:
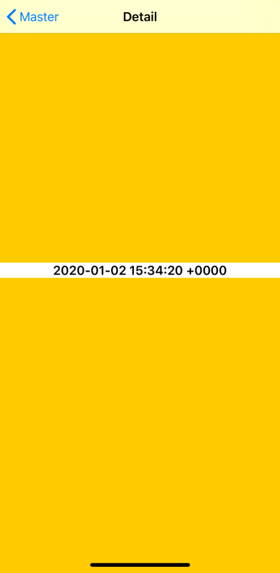
The split view controller started as an iPad only controller but in iOS 8 gained adaptability to make it available on all iOS devices. When presented in a compact width the split view controller collapses the two views into the familiar navigation view hierarchy. By default, it shows the detail view controller when collapsed.
With horizontally regular size classes such as the iPad you can choose between display modes to show both view controllers side-by-side or have the master view controller hidden or overlaying the detail view controller. These modes also collapse down gracefully when the user switches to a slide over or split screen mode.
In this post I am going to concentrate on the display mode that keeps both views visible when possible. I much prefer this to the default which hides the master view but it is easy to adapt to the other modes if required.
Preferred Display Mode
The preferredDisplayMode property is what controls the arrangement of the split view interface when it is not collapsed. It has four possible values (Objective-C values shown in parentheses):
-
primaryHidden (UISplitViewControllerDisplayModePrimaryHidden) As the name suggests this mode hides the primary view controller.
-
allVisible (UISplitViewControllerDisplayModeAllVisible) Display both the primary and secondary view controllers side-by-side.
-
primaryOverlay (UISplitViewControllerDisplayModePrimaryOverlay) Show the primary view controller overlaying and partly hiding the secondary view controller.
-
automatic (UISplitViewControllerDisplayModeAutomatic) This is the default where the split view controller chooses the display mode based on the horizontal space. It is also what you get if you use the Xcode master-detail template.
For the iPad the automatic mode switches between allVisible in landscape and primaryOverlay in portrait. For the larger iPhone Plus and Max devices it uses allVisible in landscape. For other devices and orientations the split view controller collapses the interface.
Basic Setup for All Visible Split View
I don’t like the Xcode master-detail template for creating a split view controller. It uses the app delegate as the split view controller delegate and I much prefer to use the primary or master view controller (or a parent root view controller). I also find the allVisible display mode to be a better starting point most of the time. So let’s look at the steps to create a basic setup that prefers to show both view controllers side-by-side when possible.
Creating the Split View Controller
You can easily create the view controllers in code but for brevity I will show it in a Storyboard:
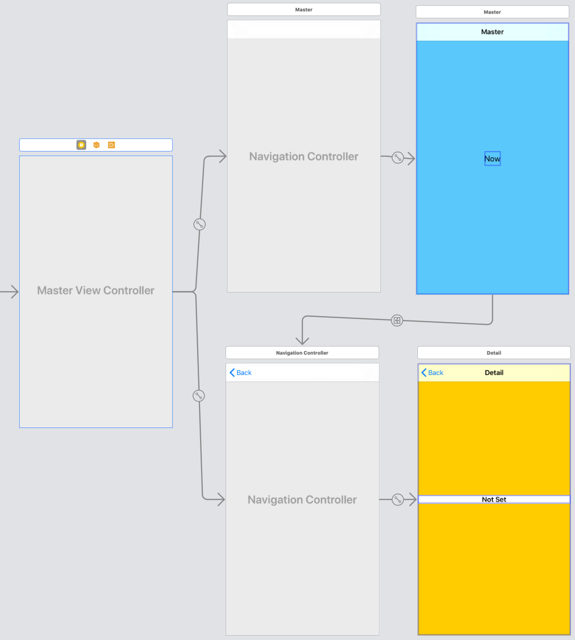
The master and detail view controllers are both embedded in navigation controllers. To keep it simple I have a single button in the master view controller that fires a show detail segue to the detail navigation controller to set the timestamp.
Configuring the Split View Controller
Even if you are creating the split view controller in a Storyboard you still need some code for configuration you cannot do in Interface Builder.
We need to set the split view controller delegate, change the preferred display mode to allVisible and add the display mode button to the secondary/detail view controller.
I do all of those steps in the application:didFinishLaunchingWithOptions: method of the application delegate. First we need to find our view controllers after they have been loaded from the storyboard. The split view controller should be the root view controller of the window:
guard let splitViewController = self.window?.rootViewController
  as? UISplitViewController else {
  fatalError("Missing SplitViewController")
}
The master view controller is the first view controller in the split view, but it’s embedded in a navigation controller:
guard let masterNavController = splitViewController.viewControllers.first
  as? UINavigationController,
  let masterViewController = masterNavController.topViewController
  as? MasterViewController else {
  fatalError("Missing MasterViewController")
}
The detail view controller is the last view controller in the split view and is also embedded in a navigation controller:
guard let navigationController = splitViewController.viewControllers.last
  as? UINavigationController,
  let detailViewController = navigationController.topViewController else {
  fatalError("Missing detail view controller")
}
If I fail to find one of the view controllers I crash immediately as it means I have something wrong in my storyboard. Now we can configure the split view controller:
splitViewController.preferredDisplayMode = .allVisible
splitViewController.delegate = masterViewController
The displayModeButtonItem property of the split view controller returns a bar button item that we add to the navigation bar of the secondary view controller.
detailViewController.navigationItem.leftBarButtonItem = splitViewController.displayModeButtonItem
detailViewController.navigationItem.leftItemsSupplementBackButton = true
Presenting the Secondary
Since I am using a Storyboard segue we will take care of configuring the secondary view controller each time in prepare(for:sender:). If you are not using segues you would perform similar steps in the target-action method used to create and present the view controller:
override func prepare(for segue: UIStoryboardSegue, sender: Any?) {
   guard let navController = segue.destination as? UINavigationController,
        let viewController = navController.topViewController as? DetailViewController else {
            fatalError("Expected DetailViewController")
    }

    // Manage the display mode button
    viewController.navigationItem.leftBarButtonItem = splitViewController?.displayModeButtonItem
    viewController.navigationItem.leftItemsSupplementBackButton = true

    // Configure the secondary view controller
    viewController.detailItem = Date()
}
The key step for the split view controller is to add the display mode button as a navigation item to the secondary view controller.
Collapsing the Secondary
There is one potential problem left. On initial startup in a horizontal compact size class such as the iPhone the split view controller collapses and will by default show the secondary view controller. This does not always make for a good user experience if we are depending on the user first doing something in the master view.
Luckily there is a delegate method we can use to control whether the collapsed split view shows the master or detail view controllers. In our master view controller:
extension MasterViewController: UISplitViewControllerDelegate {
  func splitViewController(_ splitViewController: UISplitViewController,
  collapseSecondary secondaryViewController: UIViewController,
  onto primaryViewController: UIViewController) -> Bool {

  guard let navigationController = secondaryViewController
  as? UINavigationController,
  let detailViewController = navigationController.topViewController
  as? DetailViewController else {
    // Fallback to the default
    return false
  }

  return detailViewController.detailItem == nil
  }
}
This method checks the detailItem of the detail view controller. If it’s not set we return true to disable the default behaviour of showing the detail view controller collapsed onto the master view controller.
Now when the split view controller collapses it will show the master view controller until we have set the detail item in the secondary controller.
Get The Code
What I hope you see with this example is how little code is required with a split view controller to get a highly adaptive user interface. The sample Xcode project includes both Swift and Objective-C versions if you want to take a closer look: