The release of iOS 7 introduced a number of visual changes that were intended to allow the user to focus on the content rather than the user interface. One such visual change is on the home screen where the icons move relative to the background image when the device is tilted creating a sense of depth. When discussing designing for iOS 7 the iOS Human Interface Guidelines have this to say on depth:
Visual layers and realistic motion impart vitality and heighten users’ delight and understanding.
You may not have been delighted by the home screen, some people even complained of motion sickness, but you may find situations where it is appropriate. The good news is that it only requires a few lines of code to add motion effects to a view.
Getting Started
To illustrate adding motion effects to an existing view hierarchy I have created a simple, single view example app. The storyboard has a single view controller with a view containing a hierarchy of square subviews each smaller than the containing view creating what could be a top of view of a pyramid like structure. For reference the view hierarchy in the storyboard is shown below:
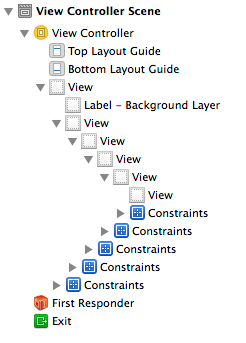
There is an outlet property in the view controller connected to the base of the pyramid of views:
@property (weak, nonatomic) IBOutlet UIView *pyramidView;
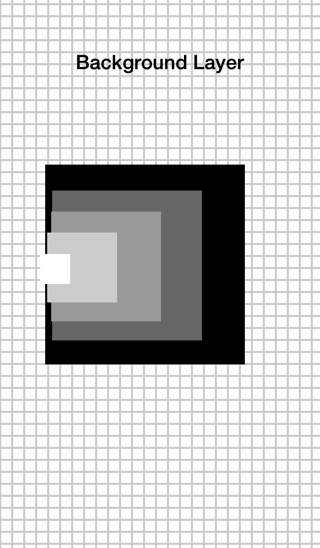
To make it easier to see the motion effects I have also set a tiled grid for the background color in the viewDidLoad method of the view controller:
- (void)viewDidLoad {
  [super viewDidLoad];
  self.view.backgroundColor = [[UIColor alloc]
  initWithPatternImage:[UIImage imageNamed:@"grid"]];
}
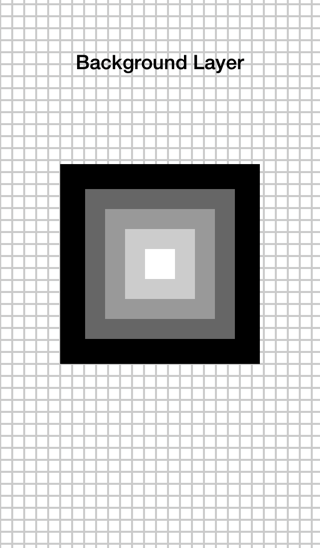
At this point, running the App produces the following static view:
Adding Motion Effects
The UIMotionEffect class is new in iOS 7 and takes care of all of the hard work of creating a motion based modifier for views. It is an abstract superclass so cannot be instantiated directly. Instead a subclass must provide an implementation of the keyPathsAndRelativeValuesForViewerOffset: method. This method must return a dictionary of one or more key path strings referring to animatable properties of a view with corresponding values to add to the property. Once created the motion effect can then be added to any UIView (or subclass of UIView) using the new in iOS 7 addMotionEffect: method.
Luckily UIKit already provides the UIInterpolatingMotionEffect subclass of UIMotionEffect to handle the common scenario of mapping the horizontal or vertical tilt of the device to an x or y axis offset of a view. When creating a UIInterpolatingMotionEffect you specify the required key path of the property of the view to be modified and an enumerated type indicating a horizontal or vertical tilt. You also need to assign values for the minimum and maximum view offsets. For example to assign a horizontal tilt motion to a view which would move by -10 to +10 points as the device is tilted horizontally:
UIInterpolatingMotionEffect *xTilt = [[UIInterpolatingMotionEffect alloc]
   initWithKeyPath:@"center.x"
              type:UIInterpolatingMotionEffectTypeTiltAlongHorizontalAxis];
xTilt.minimumRelativeValue = [NSNumber numberWithFloat:-10];
xTilt.maximumRelativeValue = [NSNumber numberWithFloat:10];
[self.view addMotionEffect:xTilt];
Note the key path to the x-coordinate of the center property of the view is center.x.
For situations where you want both a horizontal and vertical tilt motion you can create a UIMotionEffectGroup containing multiple motion effects and then add the group to the view as before:
UIInterpolatingMotionEffect *xTilt = ...;
UIInterpolatingMotionEffect *yTilt = ...;
UIMotionEffectGroup *group = [[UIMotionEffectGroup alloc] init];
group.motionEffects = @[xTilt, yTilt];
[self.view addMotionEffect:group];
To make it easy to apply varying amounts of motion to a number of views I added the following convenience method which takes as arguments the required horizontal (x) tilt, the vertical (y) tilt and the view that will get the motion effect:
- (void)addHorizontalTilt:(CGFloat)x verticalTilt:(CGFloat)y ToView:(UIView *)view
{
  UIInterpolatingMotionEffect *xAxis = nil;
  UIInterpolatingMotionEffect *yAxis = nil;

  if (x != 0.0)
  {
    xAxis = [[UIInterpolatingMotionEffect alloc]
              initWithKeyPath:@"center.x"
              type:UIInterpolatingMotionEffectTypeTiltAlongHorizontalAxis];
    xAxis.minimumRelativeValue = [NSNumber numberWithFloat:-x];
    xAxis.maximumRelativeValue = [NSNumber numberWithFloat:x];
  }

  if (y != 0.0)
  {
    yAxis = [[UIInterpolatingMotionEffect alloc]
              initWithKeyPath:@"center.y"
              type:UIInterpolatingMotionEffectTypeTiltAlongVerticalAxis];
    yAxis.minimumRelativeValue = [NSNumber numberWithFloat:-y];
    yAxis.maximumRelativeValue = [NSNumber numberWithFloat:y];
  }

  if (xAxis || yAxis)
  {
    UIMotionEffectGroup *group = [[UIMotionEffectGroup alloc] init];
    NSMutableArray *effects = [[NSMutableArray alloc] init];
    if (xAxis)
    {
        [effects addObject:xAxis];
    }

    if (yAxis)
    {
        [effects addObject:yAxis];
    }
    group.motionEffects = effects;
    [view addMotionEffect:group];
  }
}
This method works pretty much as already described. It creates a horizontal motion effect and/or a vertical motion effect, adds them to a motion effects group which is then added to the view. To apply the tilt effect to our pyramid view we can work our way down through the subviews adding an increasing amount of horizontal and vertical tilt to each view. The following code has been added to viewDidLoad for that purpose:
CGFloat tilt = 50.0;
UIView *view = self.pyramidView;
while (view)
{
  [self addHorizontalTilt:tilt verticalTilt:tilt ToView:view];
  tilt += 10;
  view = [view.subviews firstObject];
}
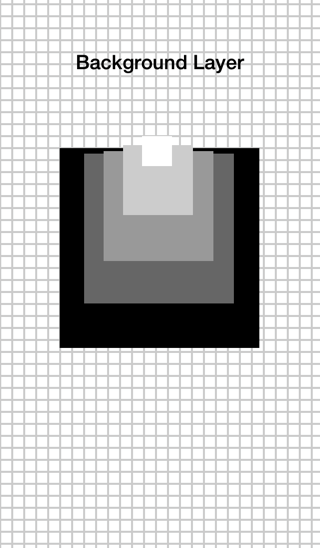
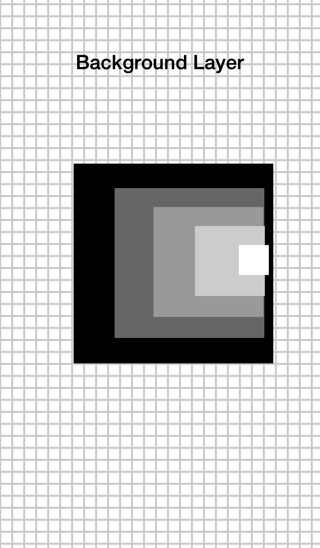
The screenshots below show the resulting effect when tilting the device up, down, left and right:

Disabling Motion Effects
One thing to remember when adding motion effects to a view is that the user always has the option to disable it. Shortly after the release of iOS 7 Apple included an option in the Accessibility settings of the device to Reduce Motion.
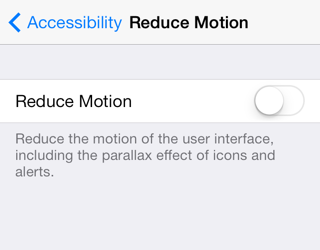
Enabling this option disables the motion effect of the icons on the home screen but will also disable any motion effects you have applied to a view.
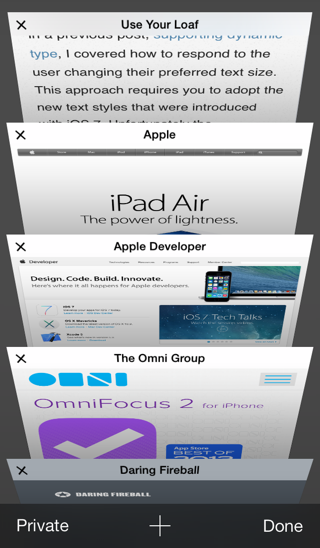
Just Because You Can…
… does not mean you should. There are places such as the home screen where I don’t find the addition of motion effects to be that compelling. However there are situations such as in Safari on the iPhone when browsing open tabs where I think it works well. The effect is subtle enough not to be annoying whilst still providing a meaningful visual cue:
Since with iOS 7 it is very easy to create motion effects there is a danger that it will quickly become overused and tired. As in all things moderation is the key.
Wrapping Up
There is not much code to share for this post but if you want to play with the sample Motion Xcode project you can find it in my GitHub CodeExamples repository.