The Social framework is now deprecated, this post is left for historical purposes only.
It is a little over two years ago that I posted about searching Twitter with iOS. In the meantime the Twitter API v1 has been retired and replaced by the Twitter Search API v1.1. This post will look at what I had to do to migrate to the new API.
A Twitter Search Application
I am not going to repeat all of the detail of the original example TwitterSearch app. The networking code is largely unchanged so refer back to original post for the full details. The basic structure of the App is organised with a RootViewController which prompts the user to enter a search term.
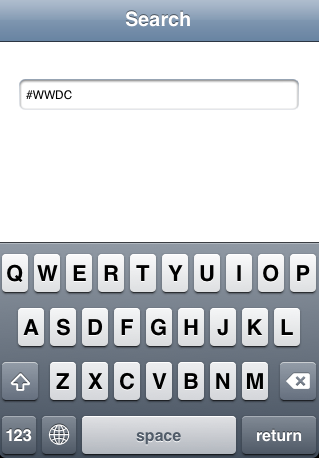
This search query is then passed to a SearchViewController which handles querying the Twitter API and displaying the results in a table view.

Updating to iOS 6
Before looking at the details of the new Twitter API I should mention a number of more general application updates that I have made to the old project. This really shows how much the iOS platform has changed in just two years:
- Build with latest versions of Xcode and LLVM compiler using modern Objective-C
- Minimum deployment target is now iOS 6.0
- Project has been converted to ARC memory management
- Converted to using NSJSONSerialization framework which did not exist at the time of the original post.
- Individual xib files have been replaced with a single storyboard.
- New launch images and icons for retina and iPhone 5 displays.
I will not go into the details of these changes as they are not the point of this post but you can take a look at the end result in the GitHub repository for the project.
Twitter Search API v1.1
If you are going to use the new Twitter search API you will probably want to read through the developer documentation at the following links:
To query the old search API you constructed a URL that looked as shown below. This would have returned up to 100 results for the search query “apple” in JSON format.
http://search.twitter.com/search.json?rpp=100&q=apple
The equivalent new API URL is as follows:
https://api.twitter.com/1.1/search/tweets.json?count=100&q=apple
The new API uses https and the session must first be authenticated. There are two possible ways to authenticate with Twitter:
The OAuth signed method allows requests to the Twitter API to be made on behalf of a Twitter user. As we will see this method is directly supported by the iOS SDK making it easy for us to implement.
The application-only authentication mechanism as the name suggests allows requests to be made without a user context. This means you can search without requiring the user to have a Twitter account but it does require that you register your App with Twitter to obtain credentials. As a result I am not going to discuss this method further for now.
The format of the search results has also changed a little. Previously the API returned a JSON dictionary containing an array of “results” where now we get back an array of “statuses”. A number of the fields within the tweet have also changed as the structure of a Tweet has grown.
The Social Framework
The other major change in the last two years is that Apple has added support for social networks in the iOS SDK. This started with the Twitter framework (TWRequest) and Accounts framework (ACAccount) in iOS 5. The ACAccount class makes life easy for us by providing a consistent way of retrieving the Twitter credentials for a user when we need to authenticate the request.
In iOS 6 the Twitter framework was deprecated and replaced with the Social framework (SLRequest) to provide a generalised interface for interacting with social networks including Facebook.
User Authentication
As I mentioned previously we now need to have end user credentials for authentication before making a request to the Twitter search API. The ACAccount framework will take care of this for us by providing an account store organised by account type. At time of writing iOS 6.1 supports accounts for Facebook, Weibo and Twitter. This allows the user to register their Twitter account on an iOS device and authorise applications to access that account.
To get started we need to add a property for an account store to the SearchViewController:
@property (nonatomic,strong) ACAccountStore *accountStore;
I use a lazy initialisation to allocate and initialise the account store:
- (ACAccountStore *)accountStore
{
  if (_accountStore == nil)
  {
    _accountStore = [[ACAccountStore alloc] init];
  }
  return _accountStore;
}
Now when we need to load the query we can check the account store for the available Twitter accounts:
- (void)loadQuery
{
  self.searchState = UYLTwitterSearchStateLoading;
  NSString *encodedQuery = [self.query stringByAddingPercentEscapesUsingEncoding:NSUTF8StringEncoding];

  ACAccountType *accountType = [self.accountStore accountTypeWithAccountTypeIdentifier:ACAccountTypeIdentifierTwitter];
  [self.accountStore requestAccessToAccountsWithType:accountType
                                           options:NULL
                                        completion:^(BOOL granted, NSError *error)
   {
     if (granted)
     {
       ...
     }
Notes:
- The user may have actually registered more than one Twitter account with the device. The user grants access for all accounts of a given type encapsulated as an ACAccountType.
- To get the ACAccountType for all registered Twitter accounts we use the instance method -accountTypeWithAccountTypeIdentifier: on the account store which will be lazily created the first time we reference it.
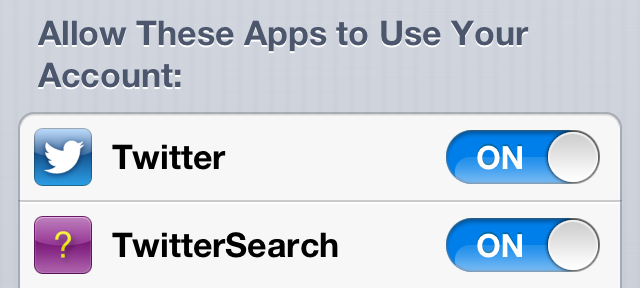
- Once we have the ACAccountType object we need to check we have permission from the user by calling requestAccessToAccountsWithType:options:completion: on the account store object. This is a block based method with a completion handler which will notify us of the result. Note that for Twitter accounts there are currently no options required. If the user has not yet granted our App permissions to use the Twitter accounts a dialog will be displayed to the user:

You should be aware that the user can revoke permissions to your App at any time from the Twitter screen of the Settings application.
- The completion handler is called when the user permissions have been determined with the granted boolean indicating if you are allowed to proceed. In this example App if we are refused permission we set the search state and reload the table (being sure to do this on the main queue) to inform the user:
     if (granted)
     {
         ...
     }
     else
     {
         self.searchState = UYLTwitterSearchStateRefused;
         dispatch_async(dispatch_get_main_queue(), ^{
             [self.tableView reloadData];
         });
     }
Updating the Search State
A small diversion before we get to actually creating the search request. To manage the state of the search request I added a searchState property to the view controller:
@property (nonatomic,assign) UYLTwitterSearchState searchState;
This property is an enumerated type for each of the states that the application can be in when issuing a request. The enumerated type is defined as follows:
typedef NS_ENUM(NSUInteger, UYLTwitterSearchState)
{
  UYLTwitterSearchStateLoading,
  UYLTwitterSearchStateNotFound,
  UYLTwitterSearchStateRefused,
  UYLTwitterSearchStateFailed
};
I will not show it here but the method -searchMessageForState: returns an NSString message for each of these states which is then used to display a message to the user in situations where we do not have search results to display. The relevant code in the tableView:cellForRowAtIndexPath: method is as follows:
NSUInteger count = [self.results count];
if ((count == 0) && (indexPath.row == 0))
{
    UITableViewCell *cell = [tableView dequeueReusableCellWithIdentifier:LoadCellIdentifier];
    cell.textLabel.text = [self searchMessageForState:self.searchState];
    return cell;
}
So in the situation where the user refuses us permission to the Twitter account type the table view will display as follows:

Creating the Request
Once we have confirmed we have permission to access the Twitter API on behalf of the user we can construct the request. The Social framework hides a lot of the details for us but we still need to construct an SLRequest object with the URL of the search API and the search parameters we want to use:
if (granted)
{
  NSURL *url = [NSURL URLWithString:@"https://api.twitter.com/1.1/search/tweets.json"];
  NSDictionary *parameters = @{@"count" : RESULTS_PERPAGE,
                                   @"q" : encodedQuery};

  SLRequest *slRequest = [SLRequest requestForServiceType:SLServiceTypeTwitter
                                            requestMethod:SLRequestMethodGET
                                                      URL:url
                                               parameters:parameters];

  NSArray *accounts = [self.accountStore accountsWithAccountType:accountType];
  slRequest.account = [accounts lastObject];
Notes:
- The URL of the search API is now https://api.twitter.com/1.1/search/tweets.json.
- The search parameters are no longer specified as part of the base URL but added to a separate dictionary. To limit the number of results we specify the count parameter (previously this was the rpp parameter).
- To create the SLRequest we use the class method requestForServiceType:requestMethod:URL:parameters: specifying that this will be an HTTP GET request (SLRequestMethodGET).
- Once we have the SLRequest object we retrieve all of the available Twitter accounts from the account store using our previously authorised ACAccountType. Since there can be more than one registered Twitter account we will just select the last one returned. In practise you may need a way to allow the user to specify which account to use when there are multiple accounts available.
Issuing the Request
The SLRequest class provides a block-based method with a completion handler for sending the request (performRequestWithHandler:). However we already have all of the code in place for performing an HTTP request using NSURLConnection that we can continue to use:
NSURLRequest *request = [slRequest preparedURLRequest];
dispatch_async(dispatch_get_main_queue(), ^{
  self.connection = [[NSURLConnection alloc] initWithRequest:request
                                                    delegate:self];
  [UIApplication sharedApplication].networkActivityIndicatorVisible = YES;
});
Notes:
- To use NSURLConnection we first need to have the SLRequest object return us an NSURLRequest for the now authorised HTTP request by calling preparedURLRequest:.
- Once we have an NSURLRequest we can pass it to NSURLConnection as in the original example. However our NSURLConnection delegate methods assume they are running on the main thread which will only work if we also initialise the request on the main thread with dispatch_async.
NSURLConnection Delegate
I am not going to go through each of the NSURLConnection delegate methods in detail as for the most part they are unchanged from the original example. For reference we have implemented four delegate methods:
- -didReceiveResponse:
- -didReceiveData:
- -connectionDidFinishLoading:
- -didFailWithError:
The results of the search query are a JSON stream that we can decode using the NSJSONSerialization framework in -connectionDidFinishLoading:
- (void)connectionDidFinishLoading:(NSURLConnection *)connection
{
  [UIApplication sharedApplication].networkActivityIndicatorVisible = NO;
  self.connection = nil;

  NSError *jsonParsingError = nil;
  NSDictionary *jsonResults = [NSJSONSerialization JSONObjectWithData:self.buffer options:0 error:&jsonParsingError];

  self.results = jsonResults[@"statuses"];
  if ([self.results count] == 0)
  {
    NSArray *errors = jsonResults[@"errors"];
    if ([errors count])
    {
        self.searchState = UYLTwitterSearchStateFailed;
    }
    else
    {
        self.searchState = UYLTwitterSearchStateNotFound;
    }
  }
Note that decoding the JSON results should give us a dictionary containing either an array of matching tweets (with key “statuses”) or an array of errors (with key “errors”). Once we have the results we need to force the table view to be reloaded so that we can update the user interface:
  self.buffer = nil;
  [self.tableView reloadData];
  [self.tableView flashScrollIndicators];
}
Updating the Table View
When we receive new results we request the table view to reload its data which will ensure that tableView:cellForRowAtIndexPath: will be called. The relevant code to show the tweet data is as follows:
UITableViewCell *cell = [tableView dequeueReusableCellWithIdentifier:ResultCellIdentifier];
NSDictionary *tweet = (self.results)[indexPath.row];
cell.textLabel.text = tweet[@"text"];
return cell;
This code makes use of the table view cell prototype defined in the storyboard. Our results data is as an array of dictionaries each representing the data for a single matching tweet. Once we have the dictionary for the current table view row we can then retrieve the tweet data by key. In this case we are just using the tweet “text”. This is most likely a violation of the Twitter display requirements which you should be aware of if you intend to show tweets in a published application.
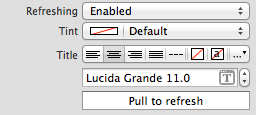
Pull To Refresh
As a final improvement to the example code I have added support for the pull-to-refresh UIRefreshControl. This mostly consists of just enabling the refresh control for the table view in the storyboard and implementing the corresponding action method when the refresh control is invoked:
The action method in this case repeats the query after first cancelling any existing connection:
- (IBAction)refreshSearchResults
{
  [self cancelConnection];
  [self loadQuery];
}
We also need to dismiss the refresh control when the connection completes or fails by inserting the following method call into connectionDidFinishLoading: and connection:didFailWithError:
[self.refreshControl endRefreshing];
Wrapping Up
It is a shame that Twitter has decided to shut off simple, unauthenticated access to the Twitter API. However if you adopt the Social framework introduced with iOS 6 it is still pretty simple to implement. If you need to support iOS 5 you can follow a similar approach using the TWRequest class.
It’s now not of much use but I have archived the original Xcode project in my code repository: