I recently posted on creating static table views with storyboards. In this post I want to look at some other changes introduced with iOS 5 to make it easier to create dynamic table views.
An Example Of Custom Table View Cells
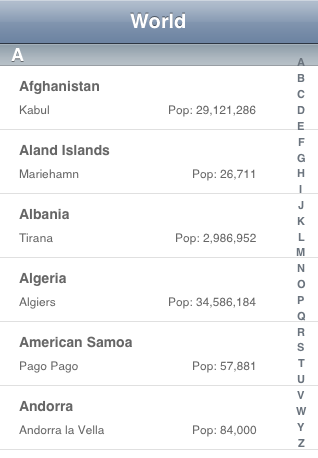
For the purposes of this discussion I am going to use an example App which consists of a single table view. The App is named WorldFacts and can be found in my Code Examples github repository. The table view uses a custom cell layout to show some country data stored in a core data model (The country data was obtained from GeoNames). The desired output is shown below:
Loading Custom Cells In iOS 4
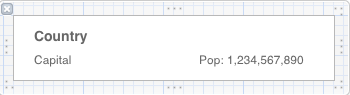
Before looking at the changes introduced with iOS 5 it is worth a quick recap of how custom cells worked in the past. Assuming you are using Interface Builder and not designing your user interface in code the first step is to create a NIB file (CountryCell.xib) containing the custom UITableViewCell. The cell layout used for this example is shown below and consists of three UILabel objects positioned to show the country name, capital and population:
The NIB file owner is set to the class of the table view controller and the cell is connected to an outlet in the controller:
@property (strong, nonatomic) IBOutlet UITableViewCell *countryCell;
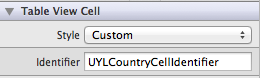
The cell identifier needs to be set in the NIB file:
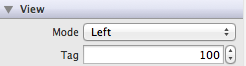
Also we need to assign a unique tag to each of the UILabel elements so that we can identify them when we configure the cell. For example the country label has a tag value of “100”:
The UINib class was introduced with iOS 4 to allow you load a NIB file into memory and instantiate new instances without the need to read the NIB each time. I have previously posted on how to use UINib to speed up table view cell loading so refer back to that earlier post for a more detailed discussion.
Our table view controller needs a property to hold the cell NIB file we read into memory with UINib:
@property (strong, nonatomic) UINib *countryCellNib;
We lazily create the UINib object in the getter as follows:
- (UINib *)countryCellNib
{
  if (!_countryCellNib)
  {
    _countryCellNib = [UINib nibWithNibName:@"CountryCell" bundle:nil];
  }
  return _countryCellNib;
}
The classic implementation of -tableView:cellForRowAtIndexPath: would then look as follows (some code omitted for brevity):
- (UITableViewCell *)tableView:(UITableView *)tableView
         cellForRowAtIndexPath:(NSIndexPath *)indexPath
{
  UITableViewCell *cell = [tableView
            dequeueReusableCellWithIdentifier:UYLCountryCellIdentifier];

  if (cell == nil)
  {
    [self.countryCellNib instantiateWithOwner:self options:nil];
    cell = self.countryCell;
    self.countryCell = nil;
  }

  // Code omitted to configure the cell...

  return cell;
}
This approach has a fair amount of code just to manage and instantiate the table view cell. The introduction of UINib may have helped with performance but it did not save any code. In fact the equivalent code for iOS 3 was pretty similar with the UINib method instantiateWithOwner:options: replaced with the NSBundle method loadNibNamed:owner:options:.
Registering a NIB with a Table View
The UITableView class has a new method in iOS 5 that allows us to register a NIB to use for a specified cell identifier:
- (void)registerNib:(UINib *)nib forCellReuseIdentifier:(NSString *)identifier
To make use of this method we can register our CountryCell NIB in the viewDidLoad method of the table view controller:
- (void)viewDidLoad
{
  ...
  ...

  UINib *countryNib = [UINib nibWithNibName:@"CountryCell" bundle:nil];
  [self.tableView registerNib:countryNib
                  forCellReuseIdentifier:UYLCountryCellIdentifier];
}
Before registering the NIB we first load it into memory using the UINib method nibWithNibName:bundle: that we saw previously. This time though we do not need an ivar to store the UINib object as we immediately register it with the table view using our country cell identifier. Once we have registered the NIB the implementation of tableView:cellForRowAtIndexPath: becomes much cleaner:
- (UITableViewCell *)tableView:(UITableView *)tableView
         cellForRowAtIndexPath:(NSIndexPath *)indexPath
{
  UITableViewCell *cell = [tableView
            dequeueReusableCellWithIdentifier:UYLCountryCellIdentifier];

  // Code omitted to configure the cell...

  return cell;
}
The key difference is that the request to dequeue a cell will always return us a cell either by taking one from the queue, if available, or by creating us a new cell using the NIB we previously registered. This removes all of the code to instantiate new cells.
Some Notes:
- It is no longer necessary to set the reuse identifier for the cell in the NIB since we specify it when we register the NIB with the table view. It does no harm to set the identifier in the NIB but leaving it blank is probably best since it removes the chances of making a mistake.
- There is no dependency on storyboards with this approach but it does require iOS 5.
Using Storyboards To Create Prototype Cells
The ability to register a NIB for a table view cell really helps to clean up the table view controller. However if you are prepared to make use of storyboards you can go one step further and eliminate the code required to register the NIB and the individual NIB files for the table view and cell.
As with the example for static tables we start by adding a new file and selecting Storyboard from the User Interface templates. Use iPhone for the device family and name the file Country.storyboard.

This is going to be a very simple storyboard but don’t let that put you off. Drag a table view controller into the storyboard and embed it into a navigation controller (from the Xcode Editor menu use Embed In > Navigation Controller). The storyboard should look as follows:
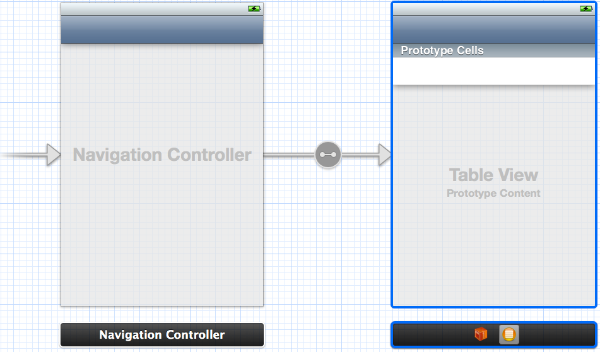
Note that by default we have a table view containing dynamic prototype cells:
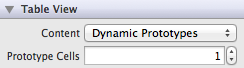
The prototype cell designed in the storyboard replaces the CountryCell.xib file. In this simple app our table view only has a single type of cell so the table view contains a single prototype cell. A table view with several types of cell design would include one prototype cell for each design. The only requirement is that each prototype cell must have a unique cell identifier. The prototype cell has a default style of custom which is what we need in this case but you can also choose one of the built-in styles if required.
The following steps complete the storyboard setup:
- using the identify inspector set the class of the controller to
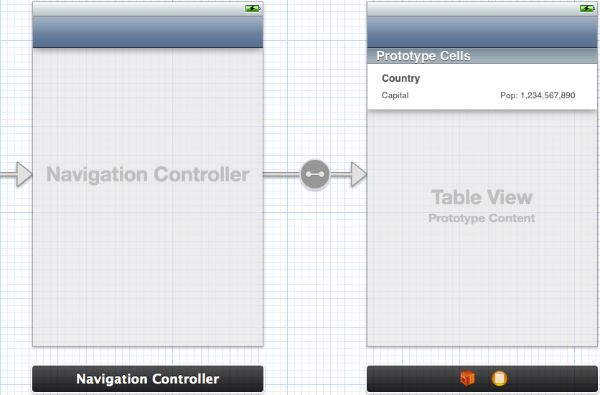
UYLCountryTableViewController. - Drag three UILabel objects into the table cell, arrange and style to taste. Remember to set the struts on the right most population label so that it sticks to the right hand side when the device is rotated.
- As before when creating the cell in a separate NIB file set a unique tag for each of the three labels so that we can identify them later.
Once finished the storyboard should look as follows:
With the table view and cell now implemented in the storyboard we can eliminate the two NIB files (CountryCell.xib and UYLCountryTableViewController.xib). We can also remove the two lines of code from the viewDidLoad method to load and register the NIB with the table view.
The final change we need to make is in the App delegate to load our storyboard in place of the view controller loaded from a NIB file. The existing code in application:didFinishLaunchingWithOptions: is as follows (some code omitted for brevity):
UYLCountryTableViewController *countryViewController =
                   [[UYLCountryTableViewController alloc]
                   initWithNibName:@"UYLCountryTableViewController"
                   bundle:nil];
UINavigationController *navController = [[UINavigationController alloc]
                   initWithRootViewController:countryViewController];
...
...

self.window.rootViewController = navController;
This code is replaced with the equivalent code to create the root view controller from the storyboard:
UIStoryboard *countryStoryboard = [UIStoryboard storyboardWithName:@"Country"
                                   bundle:nil];
UINavigationController *navController =
                       [countryStoryboard instantiateInitialViewController];
...
...

self.window.rootViewController = navController;
Note that this can be simplified further if we were to set the main storyboard file in the application target settings. I will leave the extra code for now as I want to show how storyboards can be gradually introduced to an existing project.
Wrapping Up
We already saw with static table views that storyboards can save a lot of code and are flexible enough to be introduced into an existing App without a complete rewrite. What I hope I have shown in this article is that a similar approach can also be taken with dynamic table views. If you are not ready to move fully to storyboards they can still be a good option any time you need a custom table cell layout. If you do not want to use storyboards the ability with iOS 5 to register a NIB for a given table view cell identifier can still save a lot of code.
By showing how you can make selective use of storyboards for table view design I have ignored one of the key features of storyboards which is managing the transition or segue between view controllers. That will be a topic for further discussion in an upcoming post. As always the example Xcode project that accompanies this post can be found in my GitHub Code Examples repository.