I covered in a previous post how to localise the name of an iPhone application as it appears under the icon on the iPhone home screen and in the Settings application when the app has a settings bundle. So I just wanted to finish up the topic by covering how to localize the strings that are used within the settings bundle.
Localizing Strings
First a recap. Usually with an iOS or mac OS X project when you want to localize some text that is embedded in your code you add a Localizable.strings file for each locale that you want to support. The way I usually do that is to start by adding a file named Localizable.strings to my project resources and populate it with the strings for the default English locale. Then using the Info dialog window for the file I select Make File Localizable and add the languages I want to support.
What happens when you localize a file in this way is that you end up with a set of directories, one for each locale, with a name of the form <locale>.lproj in your application bundle. So for example if you add a Spanish locale Xcode creates a directory named es.lproj for you. Each directory then contains the set of files specific for that locale.
The Settings Bundle
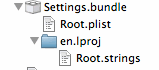
The difference when working with strings in a settings bundle is that the localization needs to happen inside the settings bundle and not the application bundle. If you look at the Settings.bundle file in the Xcode navigator you will see that it is created with an en.proj directory containing a strings file for the English locale. This makes it easier to prepare the bundle for adding other locales.
Our Root.plist file which contains the configuration settings looks like this:
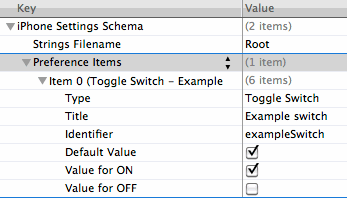
Notice the first entry that specifies the name of the strings filename (Root). There is only one string in this case that we want to localize which is the title of the toggle switch which has the value “Example switch”. Looking at the Root.strings file for the English (en) locale we see the usual key-value pair:
"Example switch" = "Example switch";
Not very exciting in this case since the key and its value have the same value which is the title of the switch. So the next step is to add some additional locales. The easiest way I have found to do that is to open the settings bundle with the Finder. You should find the Settings.bundle file at the top level of the project directory but you can also navigate to it from Xcode by right-clicking on the Settings.bundle in Xcode and selecting “Reveal in Finder”.
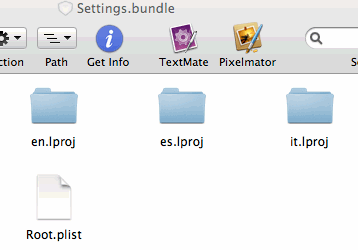
Once you have the file selected in the Finder, right-click and select “Show Package Contents”. The contents of the settings bundle will then be visible in the finder at which point you can create additional directories for each locale you want to add. In the example below I have added es.lproj and it.lproj directories for the Spanish and Italian locales. I also copied the Root.strings file from the en.lproj directory to these new directories.
Once you have added the directories to the settings bundle they should show up in Xcode under the Settings.bundle entry (you may need to open and close the directory hierarchy to get it to refresh).

At this point it is simple to edit the Root.strings file for each locale. The Spanish and Italian versions of the file finish up as follows:
// Root.strings (es locale)
"Example switch" = "Ejemplo";

// Root.strings (it locale)
"Example switch" = "Esempio";
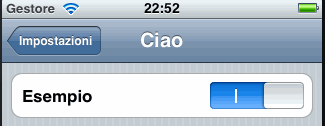
If you build and run the project and check the Settings app you should see that the title for the switch changes when you change the language settings of the device (Settings -> General -> International -> Language). So here it is first in Spanish:
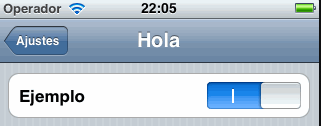
and now in Italian