Whilst making some changes to this blog recently I used the Google Developers PageSpeed tool to check page load times. One of the things it suggested was to optimize images by performing a lossless compression of the PNG image files. This set me off on a search for a good (OS X) PNG compression utility and also got me wondering about the use of PNG images by iOS. The new retinal resolution iPad has added a whole new set of 2x image files. This creates a significant increase in the size of the App that users must download so any reduction could be useful.
ImageOptim
My search for PNG compression utilities eventually led me to ImageOptim by @kornelski. This is a nice OS X GUI front-end combining a number of popular PNG compression utilities including PNGOUT and OptiPNG. To compress an image you can drag and drop onto the ImageOptim window or install an Automator service so that you compress directly from the finder. The results will obviously vary depending on the image but for the screenshot images used on this site compression rates of between 20%-50% were common.
Xcode PNG Image Compression
So do you need to bother with compressing PNG images used in iOS apps? Xcode already has a build setting that appears to take care of this for you:
![]()
To understand what that option does you can check the build logs when building for a device. You should see an entry named CopyPNGFile for each PNG file in your application that copies the PNG file into the application bundle.

If you dig a little deeper into the build log you will see that Xcode is using a private plug-in named copypng to actually perform the compress and copy operation:
"/Applications/Xcode.app/.../copypng" -compress "" <source.png> <target.png>
In the above example <source.png> is the original PNG image file in your Xcode project directory and <target.png> is the compressed PNG file that is copied to the application bundle. The application bundle (.app file) can be found by default in the Xcode derived data directory (~/Library/Developer/Xcode/DerivedData/).
If you open the app bundle (right-click on the .app file in the Finder and use the “Show Package Contents” option) you can examine the PNG files that Xcode has produced. If you try to view the PNG files in the Finder you will find that they appear to be corrupted and will not display with Preview. This is because Xcode is using a non-standard PNG format (the ImageOptim site has some more details if you are interested).
To compare the compression achieved by Xcode against ImageOptim I created an empty Xcode project and added two PNG test images. The first test image was a large background texture that I created with PixelMator for the iPad retinal display. This image is 2,048 x 1,496 pixels and weighed in at 1.5MB. I created the second image by compressing the first image with ImageOptim.
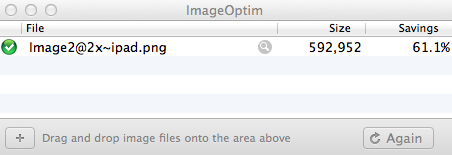
After compression the image size was reduced from 1.5MB to just over 590KB which is a substantial saving. The result of building the Xcode project and comparing the source and target file sizes was as follows:
- Image1.png - Source file: 1.5MB, Xcode output file: 1.4MB
- Image2.png - Source file: 593KB, Xcode output file: 988KB
So the first (uncompressed) image file was reduced by about 100KB which is pretty poor compared to using ImageOptim. Even worse the second file that I had already compressed actually increased in size though it was still significantly less than the first image size. Interestingly whilst the first file was not viewable indicating that it was now using the non-standard Apple PNG format the second file could be opened with Preview.
In Summary
In short it seems that you are better off disabling the Xcode PNG compression and compressing the files yourself using a tool like ImageOptim.