This is part 2 of a post covering how you can control the data protection properties of iOS keychain items. Refer back to part 1 for a more general discussion of the features.
Keychain Item Accessibility
In this post I want to be able to experiment with the various keychain migration and data protection options. To make this easier I am using a simple wrapper class (UYLPasswordManager) to hide some of the complexity of the keychain services. I will dig into the implementation of that class in a later post - it is largely a reworking of some previous code that I used in a much earlier post on simple keychain access. So to get started I should introduce the basic methods for storing and searching for items in the keychain:
Accessing the shared instance
A shared instance of the UYLPasswordManager class is used to allow some caching of the previous keychain access. This makes repeat searches fast. To access the shared instance use the class method sharedInstance:
UYLPasswordManager *manager = [UYLPasswordManager sharedInstance];
Registering a Username and Password in the Keychain
To store a username (identifier) and password (key) in the keychain use the instance method: registerKey:forIdentifier:
[registerKey:@"password" forIdentifier:@"username"];
Searching the Keychain
To search the keychain for an existing username and password use the instance method validKey:forIdentifier:
BOOL result = [manager validKey:@"password" forIdentifier:@"username"];
The result is YES if a matching username and password is found, otherwise NO is returned.
The Example App
With just those three simple methods we can create a simple example app to store and retrieve an item from the keychain. Once we have that working we can examine the effects of changing some of the data protection options. The simplest example app that I could come up with prompts the user for a username and password and then reports whether it is found in the keychain. The user interface is shown below:
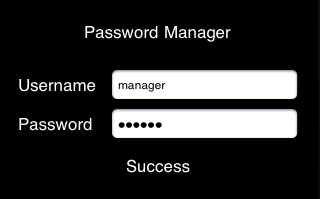
The view controller interface is very simple consisting of some text fields and labels. The view controller also implements the UITextFieldDelegate protocol. I will not show it here but the delegate of the password text field is set in Interface Builder so that we get informed when the user hits return in the password field. The interface definition is as follows:
@interface PasswordManagerViewController : UIViewController
                                           <UITextFieldDelegate> {
}
@property (nonatomic, retain) IBOutlet UILabel *pmLabel;
@property (nonatomic, retain) IBOutlet UITextField *username;
@end
In the view controller implementation we use the viewDidLoad method to store a hard-coded username and password in the keychain using the registerkey:forIdentifier: method:
- (void)viewDidLoad {
  [[UYLPasswordManager sharedInstance] registerKey:@"secret"
                                     forIdentifier:@"manager"];
}
The text field delegate method (textFieldShouldReturn:) is called when the user hits return so we perform a search of the keychain at that point and display the result:
- (BOOL)textFieldShouldReturn:(UITextField *)textField {
  self.pmLabel.hidden = NO;
  [textField resignFirstResponder];

  NSString *identifier = self.username.text;
  NSString *key = textField.text;
  if (identifier) {
    UYLPasswordManager *manager = [UYLPasswordManager sharedInstance];
    if ([manager validKey:key forIdentifier:identifier]) {
      self.pmLabel.text = @"Success";
    } else {
      self.pmLabel.text = @"Failed!";
    }
  }
  return YES;
}
Migration and Data Protection Options
So with the basics up and running we can start to experiment with the data protection options. Again to keep things easy the UYLPasswordManager has two properties to make it easy to specify migration and data accessibility of any items added to the keychain:
@property (nonatomic,assign) BOOL migrate;
@property (nonatomic,assign) UYLPMAccessMode accessMode;
The migrate property is a boolean which controls whether items added or updated to the keychain are migratable. As I explained in the previous post the keychain provides the option to specify whether an item can be migrated to a new device. If a user restores an encrypted backup to a new device the keychain items which are set to migratable will be restored to that device. This allows a user to migrate to a new device without having to manually enter password data. By default items are migratable.
The accessMode property is a little more complicated as it is an enumerated type taking thee possible values as follows:
- UYLPMAccessibleWhenUnlocked - data can only be access when the device is unlocked.
- UYLPMAccessibleAfterFirstUnlock - data can be accessed when the device is locked provided it has been unlocked at least once since the device was started.
- UYLPMAccessibleAlways - data is accessible always even when the device is locked.
The default is the most secure option, UYLPMAccessibleWhenUnlocked, which means that a keychain item cannot be retrieved when the device is locked. Note that these attributes apply to each item that is added to the keychain. When we dig into the implementation we will see that these two properties actually combine into a single attribute that is set on a keychain item (which can therefore have 6 possible values).
It is difficult to demonstrate the impact of setting the migrate option to NO since it requires a device restore. Also most of the time you probably want to leave keychain items set to be migratable. The only time you might want to change this is if you have keychain data that is only relevant to a specific device.
It is easier to play with the data protection option since the keychain services provide an application delegate method, applicationProtectedDataWillBecomeAvailable: and a notification, UIApplicationProtectedDataWillBecomeUnavailable, to allow us to detect when the device is about to be locked. Apple recommends that you use these to cleanup any user sensitive data when the device is being locked.
Since the UYLPasswordManager shared instance caches the previous keychain search it needs to have its data purged when the device is locked. A purge method makes that easy:
[[UYLPasswordManager sharedInstance] purge];
The application delegate method is useful if you can perform all of the data cleanup in the application delegate which is true in this simple application. In real life you may find it more useful to have individual view controllers listen for the notification so that they can perform their own cleanup.
Detecting when the device will lock
To illustrate the technique we can add an observer for the notification as follows:
[[NSNotificationCenter defaultCenter] addObserver:self
                       selector:@selector(deviceWillLock)
                       name:UIApplicationProtectedDataWillBecomeUnavailable
                       object:nil];
The deviceWillLock is called when the user has decided to the lock the device at which point you have about 10 seconds before the keychain protected data becomes unavailable. To test this out I created a method as follows to purge the UYLPasswordManager cache and then check the keychain after 10 seconds:
- (void)deviceWillLock {
  NSLog(@"device is about to be locked");
  [[UYLPasswordManager sharedInstance] purge];
  [self performSelector:@selector(checkKey) withObject:nil afterDelay:10];
}
The checkKey method attempts to search the keychain and outputs the result:
- (void)checkKey {
  NSLog(@"checkKey");
  UYLPasswordManager *manager = [UYLPasswordManager sharedInstance];
  if ([manager validKey:@"secret" forIdentifier:@"manager"]) {
    NSLog(@"Password valid");
  }
}
If we try this with the app running on a real device (this will not work with the simulator) we get the following:
2011-06-01 21:59:01.515 PasswordManager[20599:707] device is about to be
locked
2011-06-01 21:59:11.527 PasswordManager[20599:707] checkKey
2011-06-01 21:59:11.542 PasswordManager[20599:707] searchKeychain for
identifier: manager - Interaction with the Security Server is not allowed
The final message is logged by the UYLPasswordManager class and is the error returned by the keychain services when we tried to access our item with the device locked. To make the item accessible when locked we can set the accessMode before register the key as follows:
UYLPasswordManager *manager = [UYLPasswordManager sharedInstance];
manager.accessMode = UYLPMAccessibleAlways;
[manager registerKey:@"secret" forIdentifier:@"manager"];
Now when we run the same test we are able to access the data with the device locked:
2011-06-01 22:04:43.897 PasswordManager[20631:707] device is about to be
locked
2011-06-01 22:04:53.923 PasswordManager[20631:707] checkKey
2011-06-01 22:04:53.980 PasswordManager[20631:707] Password valid
Handling the background
There is a small issue with relying on the application delegate or notification to allow us to perform some cleanup when the device is locked. If our app is suspended in the background when the user locks the device we do not get a chance to react. So unless you need to access keychain data when you are running in the background it is a good idea to clean up as the app moves to the background. That is easy enough to do if we implement the correct application delegate:
- (void)applicationDidEnterBackground:(UIApplication *)application {
  [[UYLPasswordManager sharedInstance] purge];
}
Wrapping Up
To sum up if you are storing sensitive user data in the keychain you should think about setting the appropriate data protection class for that data. I have found that wrapping the keychain code into a separate class keeps my application code simple. I will cover the details of the UYLPasswordManager class in a future post.
You can find the full code in the GitHub repository: